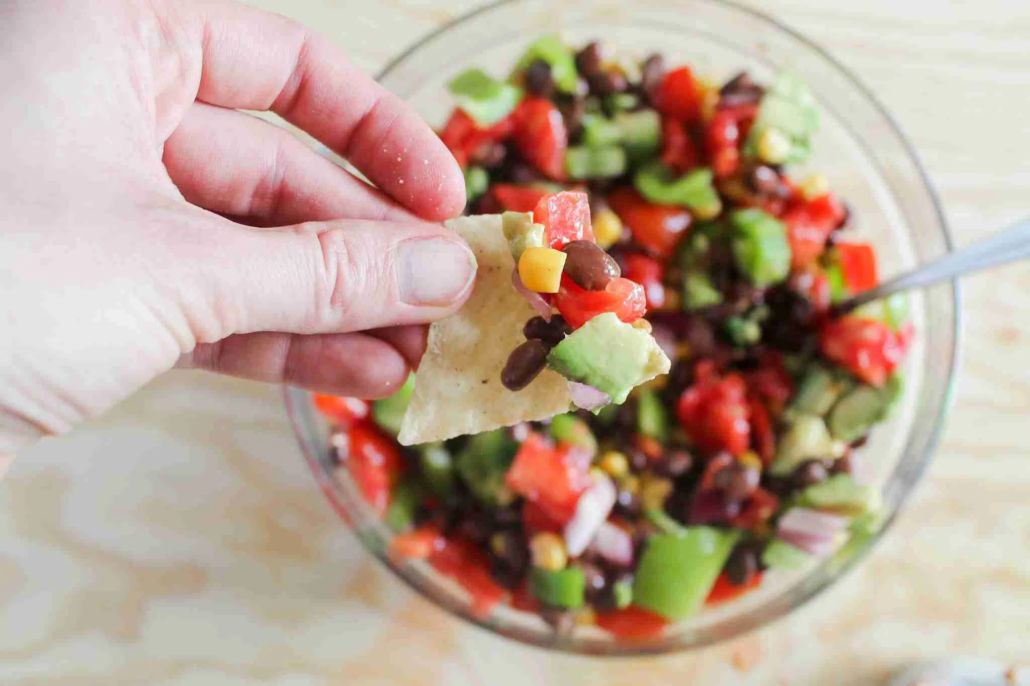
This black bean, corn, and avocado salsa is packed with protein and fiber, making it a filling and healthy snack.

Chips and salsa are a great appetizer or snack that will be a hit with most crowds.  Whether it’s game day, game night, outdoor barbecue, or just a Tuesday afternoon.

Vegan, gluten free, and low iodine friendly, this salsa is sure to become a favorite at your house too. It’s also very adaptable to your preferences.

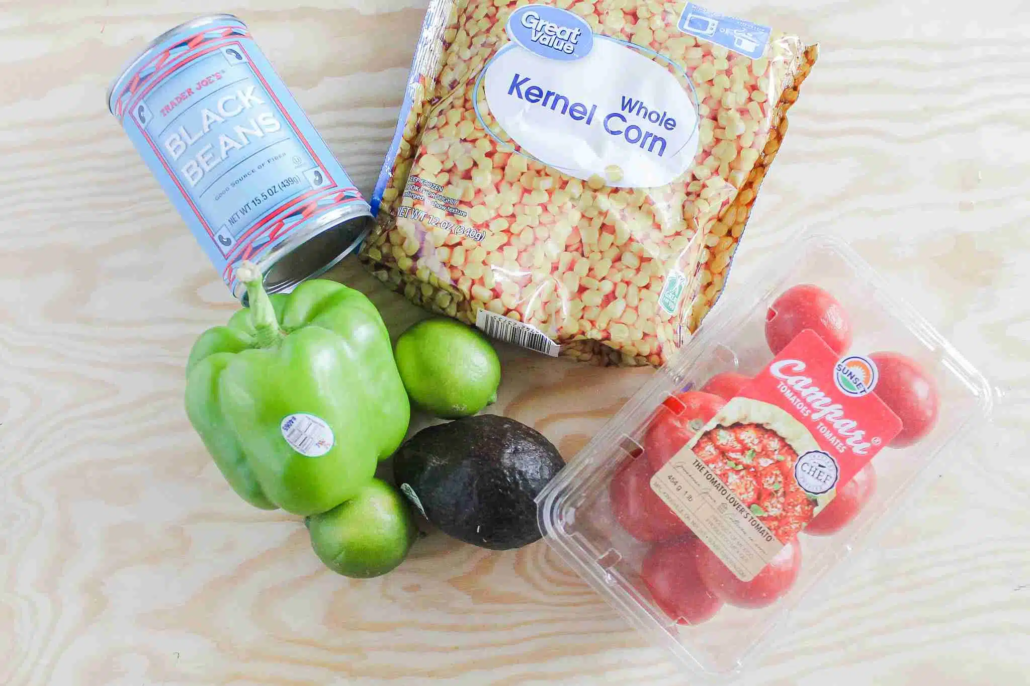
What You’ll Need

  • No salt added canned black beans
  • Tomatoes
  • Red onion
  • Bell pepper
  • Frozen corn
  • Jalapeno, optional
  • Limes
  • Avocado
  • Cilantro
  • Kosher salt, optional

How to Make

This salsa is super easy to make.  Just chop up all your fresh veggies, toss with beans and lime juice, and cilantro!

Variations and Storage

You could change up the beans if you prefer or have something else on hand.  The amount of veggies can be altered to your taste as well.

Store covered in the fridge for up to 4 days.  This will not freeze well.

FAQ’s about Black Bean, Corn, and Avocado Salsa

Why put beans in salsa?

By adding beans to salsa, you add protein.  This delicious protein makes this a more balanced snack or even meal!  The protein will help you feel full longer and power your muscles.

How do I keep avocado from turning brown?

Avocado turns brown because it oxidizes when it is exposed to air.  Here are a couple tips:

  1. Chop and add the avocado just when you are ready to serve. This decreases the amount of time it is exposed to air.
  2. Make sure the lime juice gets on the avocado. You could even toss your chopped avocado in lime juice separately before adding to the salsa. The lime juice creates a barrier to help prevent oxidation.

Are there low iodine diet friendly chips to eat this with?

Many brands of tortilla chips use sea salt.  There are unsalted tortilla chips which are a great choice.  Or you can make your own.

Low Iodine Friendly Tortilla Chips

As an Amazon Associate I earn from qualifying purchases.

Other Recipes You’ll Love

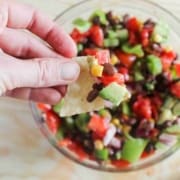
Hand raising a chip with salsa on it
Print Recipe
No ratings yet

Black Bean, Corn, and Avocado Salsa

A delicious homemade salsa packed with protein and healthy fats
Prep Time15 minutes
Cook Time0 minutes
Total Time15 minutes
Course: Appetizer
Cuisine: Mexican
Keyword: quick, snack, summer, vegan, vegetarian
Servings: 8 servings
Calories: 188kcal

Ingredients

  • 2 cans unsalted black beans rinsed and drained
  • 1 cup frozen corn thawed
  • 9 tomatoes chopped
  • red onion medium, chopped
  • 1 avocado chopped
  • 2 limes juiced
  • ¼ tsp kosher salt
  • cilantro to taste

Instructions

  • Mix all ingredients in a large bowl.
  • For best results, refrigerate for at least 30 minutes to let flavors all come together. Can serve immediately if needed

Video

Notes

This would also make a great filling for a quesadilla.  For the low iodine diet, substitute Kite Hill Ranch Dip for cheese. 
For the low iodine diet, use any unsalted tortilla chips, make your own, or select varieties of Tostitos tortilla chips, excluding hint of lime, habanero, simply organic blue corn, salsa verde, hint of guacamole, and hint of spicy queso. 
 

Nutrition

Calories: 188kcal | Carbohydrates: 32g | Protein: 9g | Fat: 4g | Saturated Fat: 1g | Polyunsaturated Fat: 1g | Monounsaturated Fat: 3g | Sodium: 84mg | Potassium: 857mg | Fiber: 12g | Sugar: 4g | Vitamin A: 1203IU | Vitamin C: 31mg | Calcium: 61mg | Iron: 3mg

Life is too short to not eat cookies.  But if you are avoiding dairy and soy for the low iodine diet or for allergy reasons, cookies can be hard to find.  

This recipe makes dairy free and soy free chocolate chip cookies that taste the same as regular cookies.  I took these to a large church gathering, and not one person out of over 50 who ate them noticed a difference!

Some links on this site are affiliate links, meaning I may receive a commission at no cost to you if you click on them. As an Amazon Associate, I earn from qualifying purchases.

What You’ll Need 

You need a few substitutions besides the traditional flour, sugar, salt, baking soda.

  • Dairy free and soy free butter substitute.  In this recipe, I used Earth Balance Buttery Spread.  You can use any soy free vegan margarine (with low iodine salt) or coconut oil.  If you are on the low iodine diet, you can use vegetable shortening as well, which has soybean oil, which is allowed.
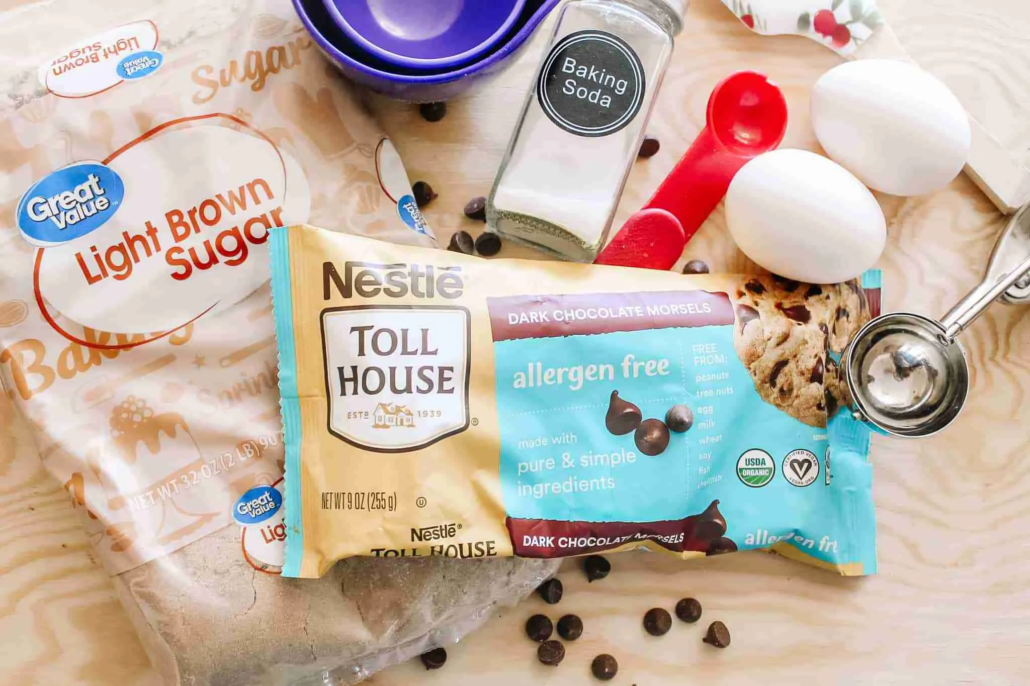
  • Dairy free and soy free chocolate chips.  Nestle Toll-House Simply Delicious Chips and Enjoy Life are good options for allergen friendly chocolate chips.
  • Egg whites (optional).  Not necessary to be free of dairy and soy, but to be low iodine friendly, you need to use all egg whites instead of whole eggs.  I use two egg whites per whole egg.  If you are using liquid egg whites, it is ¼ cup per whole egg in the recipe.

How to Make

Some equipment I recommend:

  • Stand mixer.  This is a large batch of cookies (7 dozen), so it would be difficult to mix by hand or hand electric mixer. Even a regular KitchenAid mixer is very full.
  • Cookie scoop.  This makes life so much simpler.
  • Parchment paper or silicon baking mats.
  • Good cookie or baking sheets.  If you find your cookies burning or cooking unevenly, you may have old or poor quality baking sheets.

This recipe follows the standard cookie procedure:

  1. Cream butter and sugars.
  2. Add eggs and vanilla.  Mix.
  3. Add dry ingredients.  Mix until mostly combined.
  4. Add chocolate chips.  Stir to just distribute throughout the dough.

A couple notes:

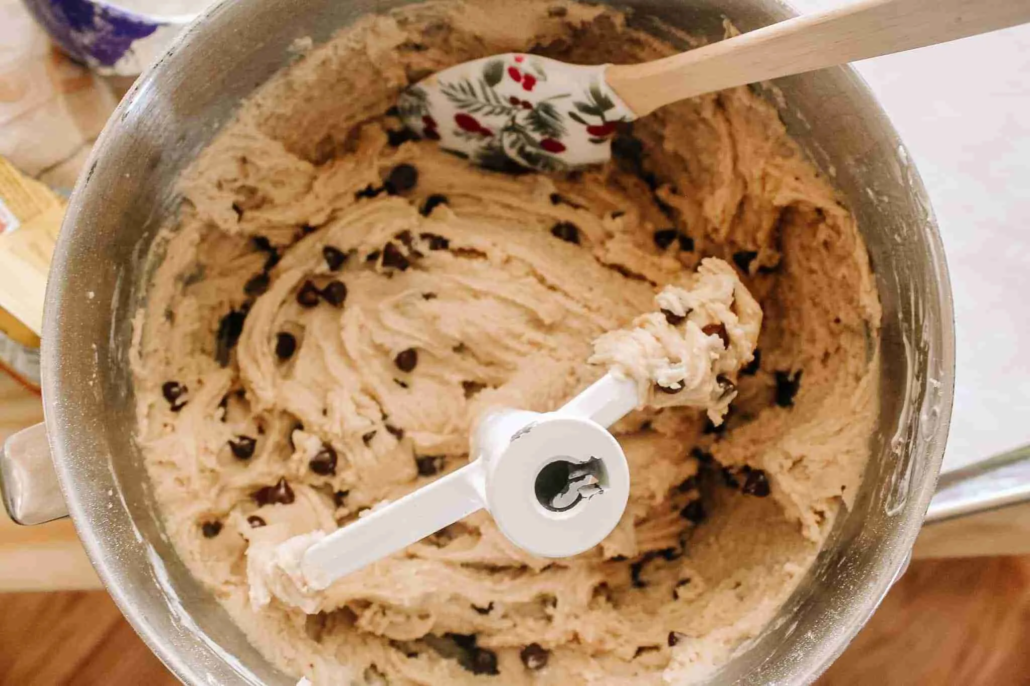
  1. This dough is a little softer than standard chocolate chip cookie dough.  However, you do not NEED to refrigerate it.  They bake up just fine.  
  2. Don’t overmix the dough.  If you mix it for a long time after the flour is combined, it is like when you knead bread dough.  The cookies will get tough.

Variations

  • White chocolate cranberry:  Substitute 1 bag of allergen free white chocolate chips and 1 cup dried cranberries for the chocolate chips.
  • Dark chocolate walnut:  Use 1 bag of allergen free dark chocolate chips and 1 cup chopped, toasted walnut instead of listed chocolate chips.

How to Store and Reheat

Make sure to cool your cookies completely before stacking and storing.

Since this makes a lot of cookies, I like to put half in a cookie jar or air-tight container.  They’ll keep for up to 1 week staying soft.  Then I put the other half in a sealed zipper bag in the freezer.  I just let them thaw a bit as I eat them.

If you want to reheat a non-frozen cookie for a fresh out of the oven experience, microwave for 5-7 seconds.

If you want to reheat a frozen cookie, microwave for 8-12 seconds.

FAQ’s about Dairy Free and Soy Free Cookies

Do cookies have dairy?

Traditional cookies have dairy in the form of butter and chocolate chips.  

Do cookies have soy?

Traditional chocolate chips generally have soy lecithin in them.  

What can I substitute for butter that doesn’t have dairy or soy?

A vegan margarine without soy, such as Earth Balance Dairy and Soy Free Buttery Spread or coconut oil make good substitutes.

Can you eat cookies if you are lactose intolerant?

Whether you can enjoy cookies if you are lactose intolerant will depend on how sensitive you are.  Most people with lactose intolerance are fine with baked goods and the minimal amount of dairy in chocolate chips.

Do chocolate chips contain dairy?

Most traditional chocolate products contain milk in the chocolate, including chocolate chips.

Are there dairy free cookie brands?

YES! If you aren’t interested in baking cookies, these cookies are dairy, egg, and iodized/sea salt free.  They may have soybean oil or soy lecithin.  Most people with soy allergy can tolerate soybean oil and/or soy lecithin, but consult with your physician.

  • Nutter butter
  • Oreo
  • HoneyMaid Graham Crackers
  • Barnum’s Animal Crackers
  • Belvita (EXCEPT: protein varieties, oats and chocolate soft baked, vanilla or strawberry yogurt creme sandwiches)
  • Biscos Sugar Wafers
  • Enjoy Life Cookies
  • Nabisco Famous Chocolate Wafers
  • Nabisco Ginger Snaps
  • Lorna Doone Shortbread Cookies
  • Mallomars cookies
  • Newtons Cookies
  • Social Tea Biscuits
  • Teddy Grahams
  • Voortman Wafers (ONLY: vanilla, strawberry, raspberry, raspberry lemonade, tropical fruit)

Are there soy free cookie brands?

Of the cookies listed above, only Enjoy Life Cookies are also entirely soy free.

Other Dairy Free Treats You’ll Love

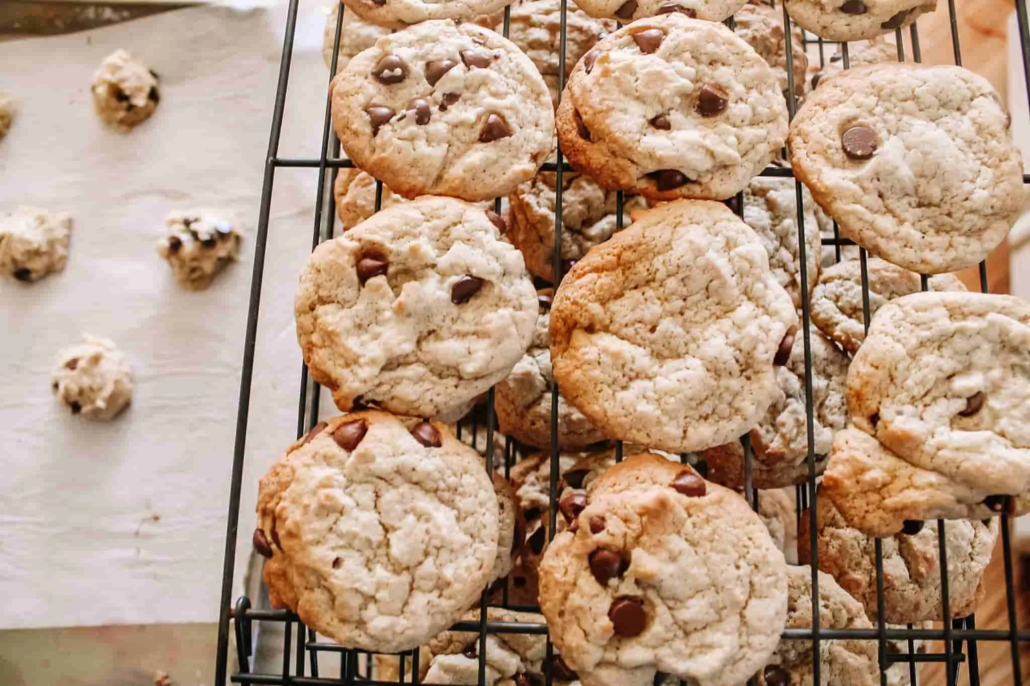
chocolate chips cookies on a cooling rack with more dough on a cookie sheet
Print Recipe
No ratings yet

Dairy Free and Soy Free Chocolate Chip Cookies

Soft, fluffy chocolate chip cookies that don't taste like they are allergen free!
Prep Time15 minutes
Cook Time40 minutes
Total Time55 minutes
Course: Dessert
Cuisine: American
Keyword: dairy free, egg yolk free, snack, soy free
Servings: 84 cookies
Calories: 84kcal

Ingredients

  • 1 ½ cup dairy free, soy free butter substitute Earth Balance spread
  • 1 ½ cup brown sugar packed
  • 1 ½ cup granulated sugar
  • 8 egg whites
  • 2 tsp vanilla extract
  • 2 tsp baking soda
  • 2 tsp non-iodized salt
  • 5 ½ cup all-purpose flour
  • 2 packages allergen free chocolate chips 12 ounces each

Instructions

  • Preheat oven to 350°F. Line two cookie sheets with parchment paper or silicone baking mat.
  • Cream butter substitute with sugars until well combined and creamy.
  • Add egg whites and vanilla. Mix to combine. Scrape bowl.
  • Add baking soda, salt, and flour. Mix until only a few streaks of flour are visible.
  • Add chocolate chips. Mix until just combined and thick dough is formed.
  • Scoop 2 tablespoon size balls of dough onto prepared cookie sheet. Bake for 8-10 minutes, or until beginning to brown and middle is set. Remove from oven. Cool on sheet for 1-2 minutes, then cool on cooling rack until room temperature.
  • Store in a covered container or freeze.

Video

Notes

Earth Balance makes a good low iodine friendly butter spread.
Most vegan baking chips should work.  These Toll-House chips are allergen free.  Enjoy Life also makes good baking chips.
I like to mix 1 package of dark chocolate chips and 1 package of semi-sweet chocolate chips.  You can mix whatever flavors you prefer or use all of one kind.
This dough is not quite as stiff as cookie dough made with butter.  But it bakes up just fine.
 

Nutrition

Calories: 84kcal | Carbohydrates: 14g | Protein: 1g | Fat: 3g | Saturated Fat: 1g | Polyunsaturated Fat: 1g | Monounsaturated Fat: 1g | Trans Fat: 1g | Sodium: 114mg | Potassium: 20mg | Fiber: 1g | Sugar: 7g | Vitamin A: 154IU | Calcium: 5mg | Iron: 1mg

Want an easy homemade bread recipe?  Look no further.  This dairy free bread uses one bowl and requires no kneading.

Whether you are looking for bread for someone with a dairy, egg, or soy allergy, a vegan diet, or for the low iodine diet (LID), this bread will work for you.

I preferred to make homemade bread when I followed the LID rather than scour bread labels for ingredients or figure out which brands use noniodized salt (LID Life was not available at the time.)

If you are the same way but don’t have any experience making homemade bread or access to a bread machine, this recipe is for you.  

What You Need to Make It

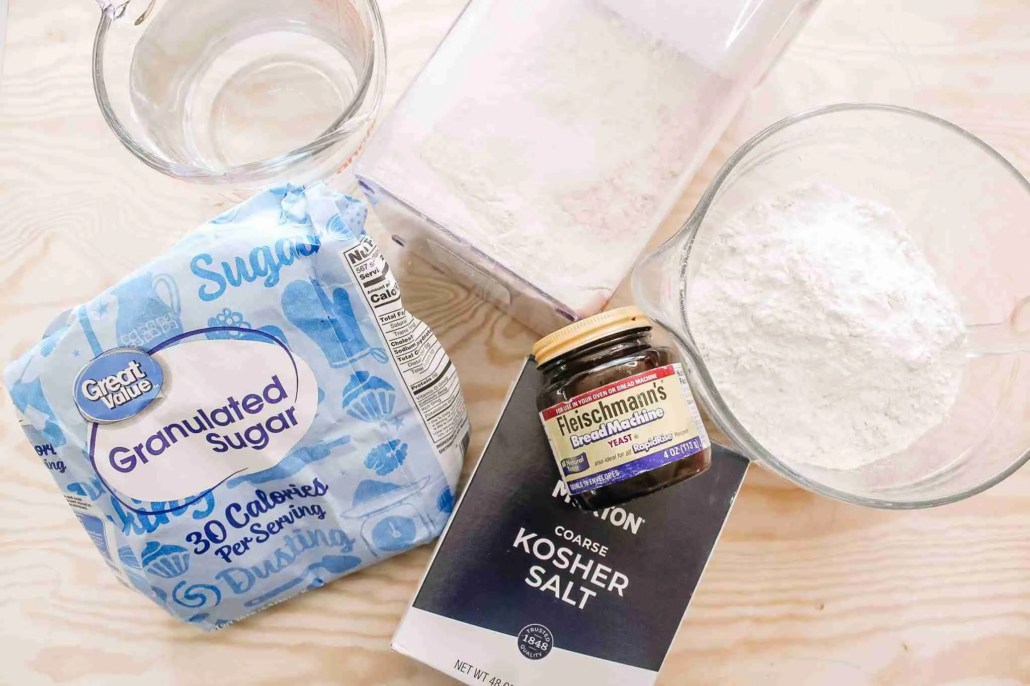
This recipe only requires 5 ingredients.

  • Flour – you can use all-purpose, white whole wheat, or a mixture.  I like to do half and half.
  • Salt (noniodized for LID) – Bread without salt has NO flavor. Milk is used to add more flavor to bread, so you don’t want to skip this.
  • Sugar – to feed the yeast
  • Instant yeast – Instant yeast is also sometimes called bread machine yeast.  For more about instant yeast, read in the FAQ below. 

How to Make Dairy Free Bread

This dairy free bread is also incredibly simple.

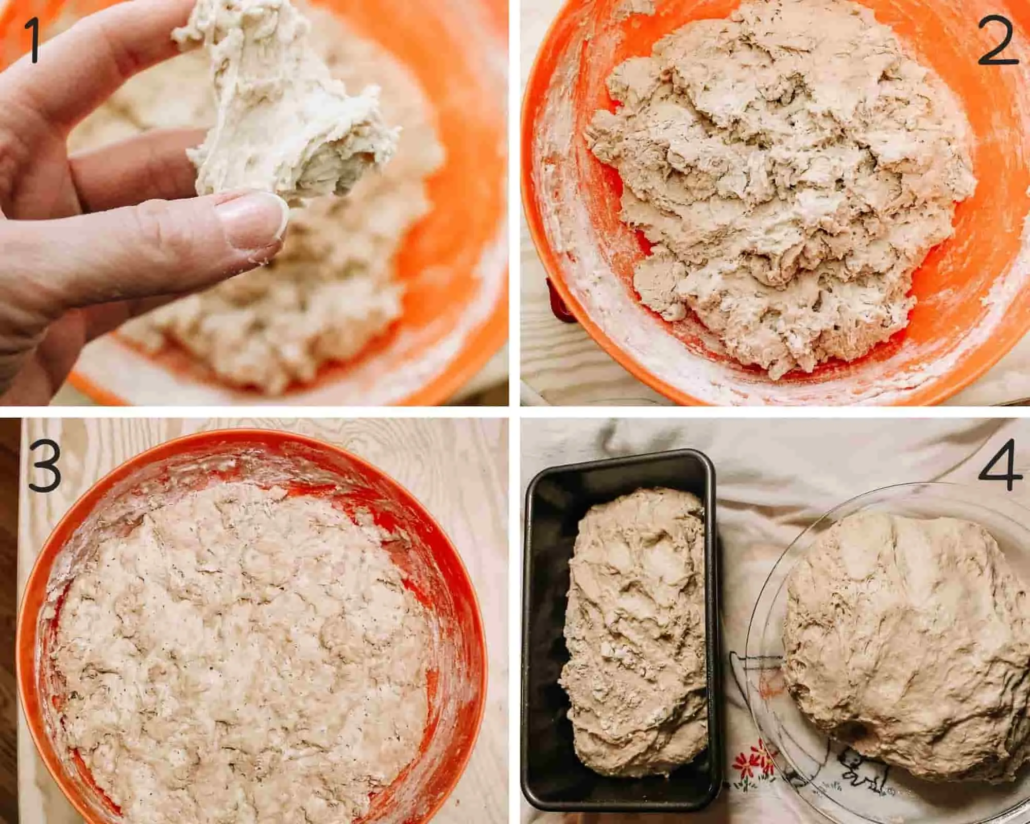
  1. Mix all the ingredients until there are no dry bits of flour.  The dough will be lumpy but stretchy.
  2. Let rise…
  3. Until double.
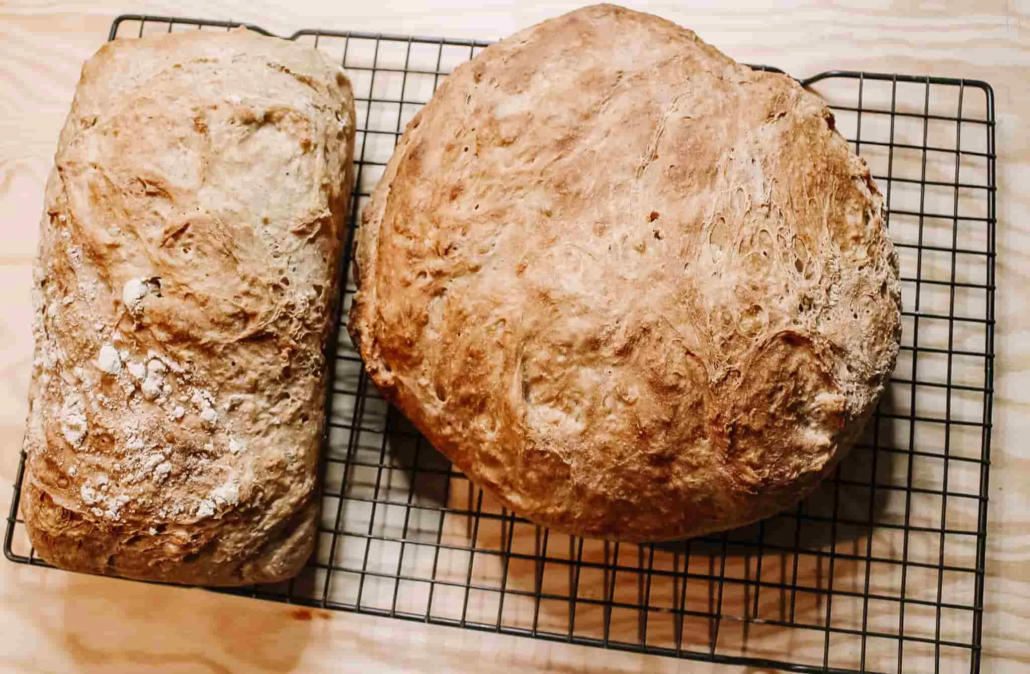
  4. Lightly shape into desired shape.  You can make this in a loaf pan or a pie pan or a glass bowl.  You choose your shape. (I double the recipe and made 2 loaves for the photo.)

Tips for Success

Use warm enough water.

You need the water warm enough to wake up the yeast and get it bubbling, but not so hot that it kills the yeast.  I have found that most people are so worried about killing the yeast that they do not get the water warm enough.  You want the water between 110 and 120 degrees F.  

Mix the dry ingredients first before adding the water.

You could just dump all the ingredients in the bowl and start stirring.  I prefer to gently stir the dry ingredients together first.  I think this helps distribute the yeast, salt, and sugar more evenly throughout the dough. 

Let it rise enough.

The time I suggest for rising is an estimate.  It will depend on how warm your kitchen is.  If you want the dough to rise quickly, turn your oven on while you make the dough.  Then turn it off and open the oven door to warm up the room.  You can also place the dough near a heat vent or in a sunny spot in your house.  

Shape it gently.

We all have heard of “punching” the dough.  But you don’t want to punch it as hard as you can and get rid of all the air you just spent an hour plus getting in there.   With this dough in particular, we want to gently shape it.  Bread gets its structure from gluten in the flour.  Kneading the dough develops the gluten and helps give that structure.  Since we didn’t knead this dough, that gluten structure isn’t as strong.  It won’t hold up as well to punching.

Cooking time will vary by shape.

Depending on if you make a loaf shape or a round shape, it will bake at different speeds.  I have found the loaf pan breads to bake faster.  Bread should sound hollow when you knock on the bottom if it is done.  You can also take the temperature of the bread like you would meat.  Bread is done at 195-200 degrees F.  

FAQ

What is instant yeast?

Instant yeast is a different strain of yeast and is ground finer so that it will dissolve faster into your dough than active dry yeast.  As a rule, recipes with instant yeast do not call for “proofing” the yeast in warm water with sugar, while those with active dry yeast do.  According to Epicurious, this step is unnecessary.  

However, I have heard of bakers liking to “proof” both kinds of yeast, just to make sure the yeast is not dead before they use it.  Yeast will keep in the freezer for up to 2 years, although I’ve had yeast in my freezer longer than that.  You can even use yeast straight from the fridge or freezer.

What is white whole wheat flour?

There are two common types of wheat grown:  soft white wheat and hard red wheat.  What we think of as “whole wheat flour” is made from hard red wheat flour.  White whole wheat flour is made from soft white wheat.  It has a less strong, bitter taste, and baked goods tend to more closely resemble their all-purpose flour counterparts.  

I like to buy King Arthur White Whole Wheat Flour.  I buy quite a few and store them in the freezer until opening.  Whole grain flours can go rancid as they do have some fat in them if they are stored for a long time.


How to Store

Once done baking, turn the bread out of the pan and let cool on a cooling rack.  Once it is completely cool, you can wrap in plastic wrap or store in a resealable bag.  Air exposure will make the bread go stale.

Please note that homemade bread becomes stale faster than store bought bread, as it does not have the preservatives and conditioners added to the dough.

Other Recipes You’ll Love

Tahini Toast with Apples and Honey is a great use of your delicious bread.

Whole Wheat Honey Oat Bread is great if you are up for more of a traditional bread recipe that is also dairy free.

two loaves of bread on a cooling rack with 2 slices of bread, one with jam spread on the surface
Print Recipe
4.43 from 7 votes

Easy, No-Knead Dairy Free Bread

This one bowl bread requires only 5 ingredients, no kneading and is dairy, egg, and soy free.
Prep Time25 minutes
Cook Time30 minutes
Rising Time2 hours
Total Time2 hours 55 minutes
Course: Bread
Cuisine: American
Keyword: dairy free, egg free, soy free, vegan
Servings: 10 slices
Calories: 186kcal

Equipment

  • loaf pan
  • pie plate
  • glass bowl

Ingredients

  • 4 cups all-purpose flour can also use all or part white whole wheat flour
  • 1 ½ tsp salt noniodized or kosher
  • 2 tsp sugar
  • 1 tbsp instant yeast
  • 2 cups warm water 110-120 degrees F
  • cooking spray for pan and your hands

Instructions

  • Combine all the ingredients in a very large bowl. Mix to combine.
  • Add water and stir with a wooden spoon until a lumpy dough forms. There should not be any dry flour, but the dough will be lumpy and sticky.
  • Cover the bowl with a dish towel or greased plastic wrap and leave in a warm place to rise. Dough should double in size in about 1 to 1 ½ hours.
  • Prepare your baking dish by lightly greasing with cooking spray.
  • Uncover dough. Grease your hands with cooking spray. Gently shape the dough into the shape of your pan, being careful not to deflate the dough. Carefully transfer to prepared pan.
  • Cover dough in pan with towel or plastic wrap again. Let rise for 15-30 minutes, until looking bubbly or puffy.
  • Preheat oven to 425°F. Once heated, place prepared loaf into oven. Bake for 15 minutes. Then reduce temperature to 375°F, and bake until golden brown all around, about 15-25 minutes more.

Notes

You can bake this in a loaf pan, a pie pan, or a medium size glass bowl.  See links in equipment description.

Nutrition

Calories: 186kcal | Carbohydrates: 39g | Protein: 5g | Fat: 1g | Saturated Fat: 1g | Polyunsaturated Fat: 1g | Monounsaturated Fat: 1g | Sodium: 352mg | Potassium: 57mg | Fiber: 1g | Sugar: 1g | Vitamin C: 1mg | Calcium: 9mg | Iron: 2mg

Looking for a snack that is healthy, high in fiber, high in protein, and still satisfies your sweet tooth?  These no-bake, healthy apricot energy balls are all of that and more:  vegan, gluten free, and paleo friendly.  A hit for all ages, you definitely want to add these to your snack routine.

Some links on this site are affiliate links, meaning I may receive a commission at no cost to you if you click on them. As an Amazon Associate, I earn from qualifying purchases.

What You’ll Need to Make It

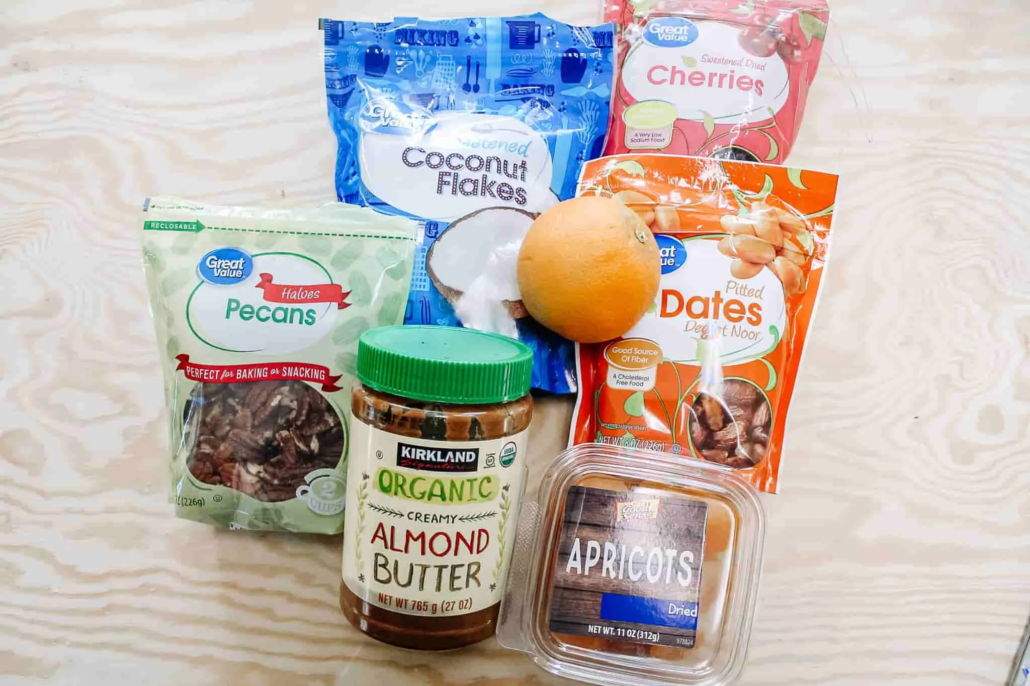
  • 2 cups of dried fruit.  I like to use 1 cup of apricots, ½ cup dried, pitted dates, and ½ cup dried cherries. 
  • 2 cups chopped unsalted nuts.  I like pecans, but any unsalted nut is a good option.
  • 1 cup shredded coconut. If you kind find unsweetened, that is best. (NOTE: I have Great Value Coconut pictured here. It is NOT low iodine friendly as it contains salt and Great Value brand does not state that it uses noniodized salt.
  • Juice of 1 orange
  • 6 tablespoons almond butter.  I like the Costco brand.  You could substitute peanut butter, tahini, or any nut butter you prefer.
  • food processor. I have had this one for over 10 years and really like it. I think investing in a good food processor is a good investment.

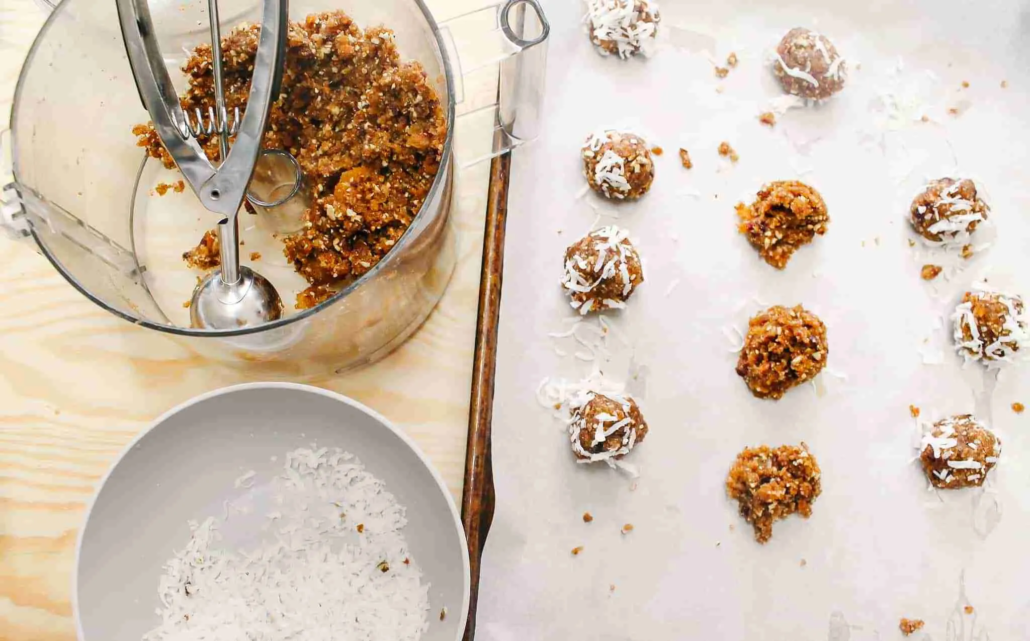
This recipe couldn’t be simpler.  Chop and blend everything in the food processor or blender.  Then scoop it out, roll in coconut, and enjoy!

Variations

  • Mix up or simplify the dried fruit.  You could make all apricot energy balls, or add a different variety of dried fruit you have on hand.
  • Use your favorite nuts or nut butters.  I often use walnuts instead of pecans.  Almond butter is a milder taste to me, but peanut butter would also work. 
  • Want to add some omega-3 fatty acids?  You can definitely add a tablespoon of chia or flax seeds to the dough as well.  
  • Nut-free energy balls?  Skip the pecans, and use sunflower seed butter.  You will need to increase the amount of sunflower seed butter or add some honey or maple syrup to make sure it all sticks together.

Tips for Success

I like to use my cookie dough scoop to make it even easier.  Then they are already “ball” shaped and I don’t have to do any rolling.

If the balls are too sticky to roll, stick them in the fridge for 30 minutes or so.  This will firm up the dough making it easier to work with.

I like the look of shredded coconut on the outside.  But you could also grind the coconut in your food processor to more of a powder for a more dusted look.

These are a great recipe for getting kids involved in the kitchen as well.  The only sharp object is the food processor blade.  Kids love rolling the balls and coating them in coconut. 

FAQ

What are energy balls?

Energy balls are a generic term for bite size snacks that are good sources of protein and fiber.  They can be made up of lots of things, including dried fruit, oats, honey, nut butter, chocolate chips, and more.  

The great thing about energy balls is they are almost infinitely adaptable.  You can substitute flavors you like to make them yours.

Are energy balls really healthy?

Like most things, energy balls are healthy in moderation.  They are good sources of fiber and protein and low in ADDED sugars.  So, they make a great sweet snack without lots of added sugar.  

However, they should be enjoyed in moderation.  Too much dried fruit can lead to tummy troubles.  And they are not necessarily low in calories.

For the full nutrient breakdown of these healthy apricot energy balls, see the recipe card below.

Why won’t my energy ball dough stick together?

There are a variety of reasons.  Here a few tricks to try:

  • Add more almond butter.  
  • Add a sticky sweetener, such as honey.
  • Pulse it a little longer in the food processor to see if it comes together.
  • Try refrigerating it for 30 minutes or so and see if it firms up.

Why isn’t the fruit breaking down?

While you do need dried fruit, you don’t want shriveled and rock hard dried fruit.  Try to use “fresh” dried fruit, or soak it in a little hot water if your dried fruit seems too hard.  (Like when someone forgets to close the container.  Happens at my house for sure).

How to Store

These should be stored covered in the refrigerator or freezer.  In the fridge, they last about 2 weeks.  I personally like to freeze them.  Then if kids take them for a snack at school or for lunch, they don’t “melt” too much.  

What I Love About Apricot Almond Butter Energy Balls

I love these healthy apricot energy balls because they are a great, healthy, quick snack.  It also helps hit my sweet tooth in a healthier way than grabbing some chocolate.  I also love that my kids love them for a quick snack or easy to pack lunch with protein and fiber.

Need more snack ideas?

Check out these recipes:

Looking for more help with your low iodine diet?

My e-book, The Simplified Low Iodine Diet Toolkit, includes meal plans, recipes, snack guides, and more. Click here to learn more!

Hand holding apricot almond butter energy ball over white plate with several energy balls
Print Recipe
No ratings yet

Healthy Apricot Almond Butter Energy Balls

Bite size snacks filled with dried fruit, nuts, and almond butter.
Prep Time15 minutes
Course: Snack
Cuisine: American
Keyword: dairy free, gluten free, paleo, vegan, vegetarian
Servings: 26 balls
Calories: 126kcal

Equipment

  • food processor or blender

Ingredients

  • 1 cup dried apricots
  • 2 cups chopped, unsalted pecans
  • 1 cup shredded coconut divided
  • ½ cup dried, pitted dates
  • ½ cup dried cherries
  • 1 juice of orange
  • 6 tbsp almond butter

Instructions

  • Line a baking sheet with parchment paper or aluminum foil.
  • Place all of the ingredients (except ½ of the coconut) into the food processor. Blend until smooth.
  • Scoop about tablespoon size portions. Roll into a ball. Place on prepared baking sheet.
  • Roll balls in remaining coconut. Store in covered container in refrigerator or freezer.

Video

Notes

You can use all apricots and skip the dates and cherries if you’d prefer.
If the dough is too sticky to roll, scoop onto baking tray and refrigerate until it firms up a bit.

Nutrition

Serving: 1ball | Calories: 126kcal | Carbohydrates: 11g | Protein: 2g | Fat: 9g | Saturated Fat: 2g | Polyunsaturated Fat: 2g | Monounsaturated Fat: 5g | Sodium: 10mg | Potassium: 155mg | Fiber: 2g | Sugar: 8g | Vitamin A: 273IU | Vitamin C: 1mg | Calcium: 25mg | Iron: 1mg

These vegan zucchini fries are a healthy vegetable all dressed up in its crispy finger food finest. Crispy while being vegan and keto friendly, they will be a hit with everyone!

As an Amazon Associate, I earn from qualifying purchases.

What you’ll need to make vegan zucchini fries

Zucchini fries normally have eggs and cheese to make, but we are making these without those to be vegan and LID friendly.

Ingredients:

  • plant based milk (Elmhurst is a great LID friendly option) 
  • nutritional yeast
  • matzo crackers or breadcrumbs (Kikkoman for LID)
  • walnuts
  • olive oil
  • garlic
  • salt (non iodized for LID)
  • Black pepper

Special equipment (optional):

  • food processor
  • wire baking rack
  • air fryer

How to make

It only takes a few simple steps to make vegan zucchini fries: 

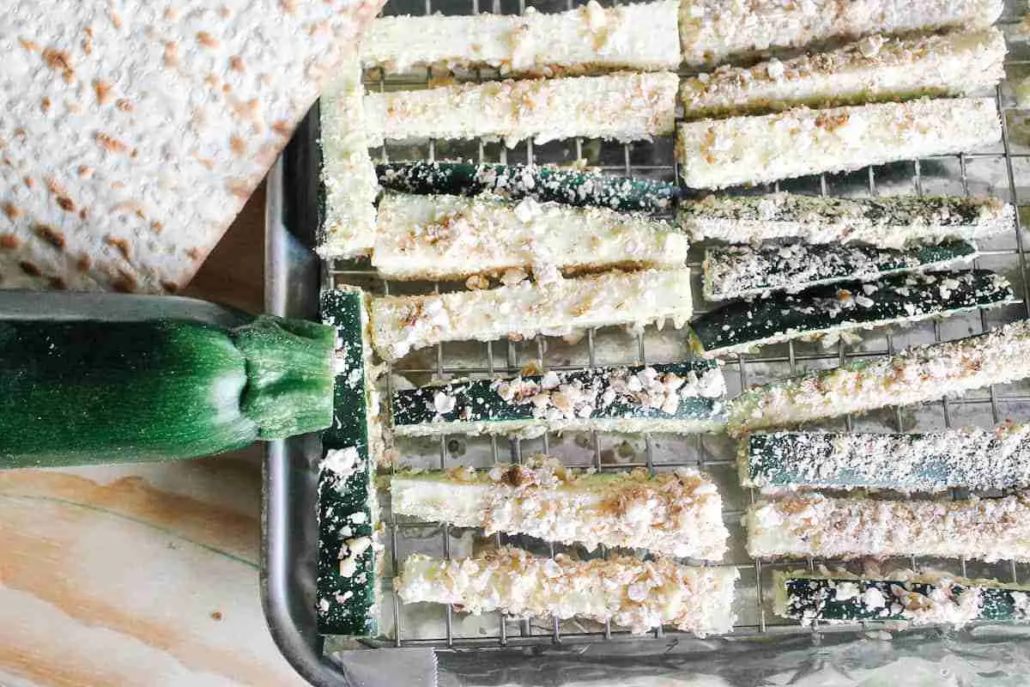
  • Cut zucchini into fry shape.  Don’t go too thin, as it will be harder to get the crumbs to stick. 
  • Chop walnuts (and matzo if using) in a food processor.  
  • Add nutritional yeast, breadcrumbs (if not using matzo), salt, and pepper.  Pulse until all is the consistency of bread crumbs.  
  • Heat the olive oil with the garlic to infuse flavor, then toast crumb mixture in olive oil.
  • Dip zucchini into “milk”, then into breadcrumb mixture.  Press down to make sure crumbs stick.
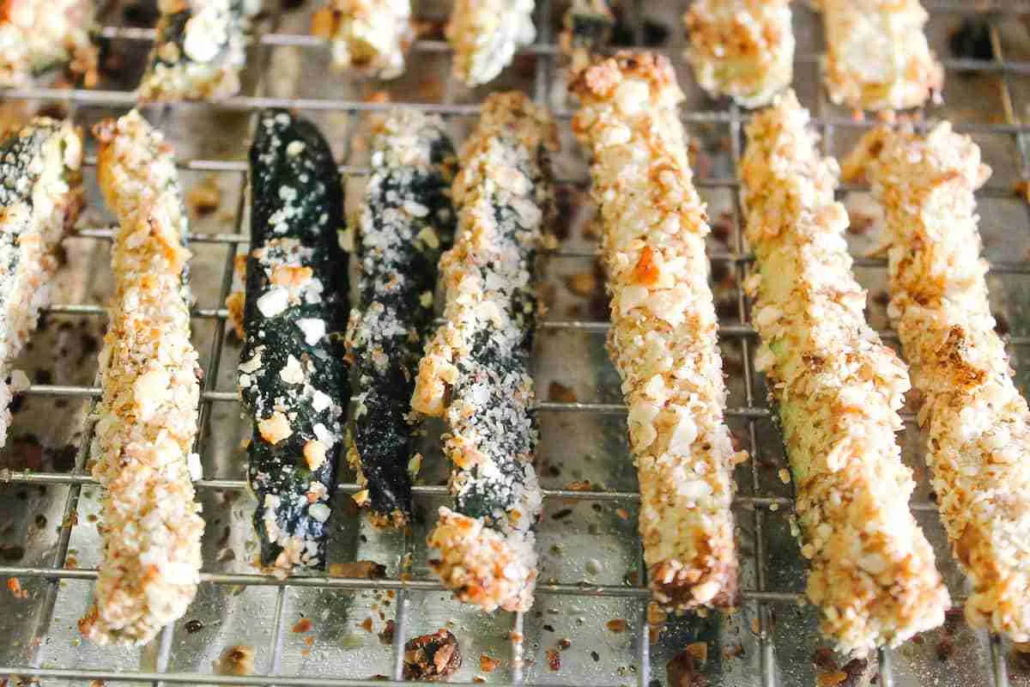
  • Bake on wire rack.  The wire rack promotes crispiness all the way around.

Variations of Zucchini Fries

  • Air fryer vegan zucchini fries: If you want to use an air fryer, you will fry at 400 degrees F for 10 minutes total.  Spray the fries with cooking spray before putting in the fryer.  After 5 minutes, pull out the basket, shake the fries, and spray with cooking spray again.  Cook for another 5 minutes, or your desired level of doneness.
  • Nut free:  You could skip the walnuts in the crumb mixture if you are avoiding tree nuts.
  • Zucchini fries without breadcrumbs:  You could use flour flavored with nutritional yeast, garlic powder, salt, and pepper in place of the breadcrumb mixture.  The coating will be less of your typical bread coating but is still yummy.  
  • Gluten free zucchini fries:  Substitute gluten free crackers for the matzo crackers or breadcrumbs.  Or just flavor almond flour with nutrition yeast, garlic powder, salt, and pepper.  
  • You could mix up the seasonings for any variation you’d like: Italian seasoning, add some cayenne and cumin for zesty flavors, etc. 

FAQ

Do I need to salt the zucchini first?  

I feel like recipes online are 50/50 on salting the zucchini first.  Salting the zucchini should draw out water from the zucchini, which is a really watery vegetable.  It should make it more crisp and less soggy.  In all my practicing, I did not notice a difference between the batches where I salted the zucchini and did not.  

What is nutritional yeast?

Nutritional yeast is NOT the same yeast you use to bake bread.  Nutritional yeast is flakes of inactive yeast.  While it starts as the same species as baking yeast, it is fermented, has nutrients added, and then is dried to inactivate the yeast.  It is a great source of protein and B vitamins, including B12. It is a great substitute for cheese when avoiding dairy.

Is the low iodine diet vegan?

You do not have to follow a vegan diet while on the low iodine diet. However, vegan recipes are often a good resource as they avoid eggs and dairy. Just be cautious of sea salt and other high iodine foods, such as most commercial plant based milks.

For more on the low iodine diet, check out my Low Iodine Diet Basics.

Tips for Reheating

Like most fried foods, zucchini fries do not make the best leftovers.  You can reheat them in the oven for 5-10 minutes until warm.  Or reheat in the air fryer.  Putting them in the microwave will lead to a soggy mess.

Crispy vegan zucchini fries with dipping sauce
Print Recipe
No ratings yet

Crispy Vegan Zucchini Fries

Crunchy zucchini fries without dairy or eggs – vegan, keto, and low iodine friendly!
Prep Time15 minutes
Cook Time30 minutes
Course: Appetizer, Side Dish
Cuisine: American
Keyword: dairy free, snack, summer, vegan
Servings: 4
Calories: 387kcal

Equipment

  • food processor
  • wire baking rack optional

Ingredients

  • 2 medium zucchini
  • cooking spray
  • ¾ cup plant-based milk almond, oat, not soy
  • ½ tsp salt non iodized for LID, divided
  • ½ tsp ground black pepper divided
  • 1 cup walnuts unsalted
  • 1 sheet matzo cracker or ½ cup breadcrumbs
  • ¼ cup nutritional yeast
  • 1 clove garlic peeled
  • cup olive oil

Instructions

  • Cut the zucchini into sticks (fry shapes), about 3 inches long and ½ inch thick.
  • Preheat oven to 425 degrees F. Line a baking sheet with aluminum foil. Place wire baking sheets on top and spray with non stick cooking spray.
  • Combine milk, ¼ tsp salt, and ¼ tsp pepper in shallow bowl.
  • In a food processor, chop walnuts and matzo (if using) until small pieces. Add remaining salt and pepper, nutritional yeast, and breadcrumbs (if using). Process until all is the consistency of breadcrumbs.
  • Heat olive oil in a small fry pan over medium-low heat. When warm, add whole clove of garlic. Cook until fragrant. Remove garlic from oil.
  • Add breadcrumb/nut mixture to oil. Toast until golden brown. Remove from heat, and place in a shallow dish.
  • Dip zucchini fries in milk, then in breadcrumb mixture. Press gently to ensure crumbs stick. Place carefully on prepared wire rack, ensuring fries do not touch.
  • Bake at 425 for 20-30 minutes, until crumbs are crispy and golden brown.

Notes

To cook in the air fryer:  Preheat air fryer to 400.  Spray lightly with cooking spray, fry for 5 minutes.  Remove basket, shake fries, spray again with cooking spray, and cook for 5 more minutes, or until desired level of crispness.
See the post for recommendations for LID friendly milk and breadcrumbs.

Nutrition

Calories: 387kcal | Carbohydrates: 9g | Protein: 7g | Fat: 38g | Saturated Fat: 4g | Polyunsaturated Fat: 16g | Monounsaturated Fat: 16g | Sodium: 361mg | Potassium: 447mg | Fiber: 4g | Sugar: 3g | Vitamin A: 203IU | Vitamin C: 18mg | Calcium: 103mg | Iron: 2mg

Let me know how you enjoy your crispy vegan zucchini fries!

  • plant based milk (Elmhurst is a great LID friendly option) 
  • nutritional yeast
  • matzo crackers or breadcrumbs (Kikkoman for LID)
  • walnuts
  • olive oil
  • garlic
  • salt (non iodized for LID)
  • Black pepper

Special equipment (optional):

  • food processor
  • wire baking rack
  • air fryer

How to make

It only takes a few simple steps to make vegan zucchini fries: 

  • Cut zucchini into fry shape.  Don’t go too thin, as it will be harder to get the crumbs to stick. 
  • Chop walnuts (and matzo if using) in a food processor.  
  • Add nutritional yeast, breadcrumbs (if not using matzo), salt, and pepper.  Pulse until all is the consistency of bread crumbs.  
  • Heat the olive oil with the garlic to infuse flavor, then toast crumb mixture in olive oil.
  • Dip zucchini into “milk”, then into breadcrumb mixture.  Press down to make sure crumbs stick.
  • Bake on wire rack.  The wire rack promotes crispiness all the way around.

Variations of Zucchini Fries

  • Air fryer vegan zucchini fries: If you want to use an air fryer, you will fry at 400 degrees F for 10 minutes total.  Spray the fries with cooking spray before putting in the fryer.  After 5 minutes, pull out the basket, shake the fries, and spray with cooking spray again.  Cook for another 5 minutes, or your desired level of doneness.
  • Nut free:  You could skip the walnuts in the crumb mixture if you are avoiding tree nuts.
  • Zucchini fries without breadcrumbs:  You could use flour flavored with nutritional yeast, garlic powder, salt, and pepper in place of the breadcrumb mixture.  The coating will be less of your typical bread coating but is still yummy.  
  • Gluten free zucchini fries:  Substitute gluten free crackers for the matzo crackers or breadcrumbs.  Or just flavor almond flour with nutrition yeast, garlic powder, salt, and pepper.  
  • You could mix up the seasonings for any variation you’d like: Italian seasoning, add some cayenne and cumin for zesty flavors, etc. 

FAQ

Do I need to salt the zucchini first?  

I feel like recipes online are 50/50 on salting the zucchini first.  Salting the zucchini should draw out water from the zucchini, which is a really watery vegetable.  It should make it more crisp and less soggy.  In all my practicing, I did not notice a difference between the batches where I salted the zucchini and did not.  

What is nutritional yeast?

Nutritional yeast is NOT the same yeast you use to bake bread.  Nutritional yeast is flakes of inactive yeast.  While it starts as the same species as baking yeast, it is fermented, has nutrients added, and then is dried to inactivate the yeast.  It is a great source of protein and B vitamins, including B12. It is a great substitute for cheese when avoiding dairy.

Is the low iodine diet vegan?

You do not have to follow a vegan diet while on the low iodine diet. However, vegan recipes are often a good resource as they avoid eggs and dairy. Just be cautious of sea salt and other high iodine foods, such as most commercial plant based milks.

For more on the low iodine diet, check out my Low Iodine Diet Basics.

Tips for Reheating

Like most fried foods, zucchini fries do not make the best leftovers.  You can reheat them in the oven for 5-10 minutes until warm.  Or reheat in the air fryer.  Putting them in the microwave will lead to a soggy mess.

Crispy vegan zucchini fries with dipping sauce
Print Recipe
No ratings yet

Crispy Vegan Zucchini Fries

Crunchy zucchini fries without dairy or eggs - vegan, keto, and low iodine friendly!
Prep Time15 minutes
Cook Time30 minutes
Course: Appetizer, Side Dish
Cuisine: American
Keyword: dairy free, snack, summer, vegan
Servings: 4
Calories: 387kcal

Equipment

  • food processor
  • wire baking rack optional

Ingredients

  • 2 medium zucchini
  • cooking spray
  • ¾ cup plant-based milk almond, oat, not soy
  • ½ tsp salt non iodized for LID, divided
  • ½ tsp ground black pepper divided
  • 1 cup walnuts unsalted
  • 1 sheet matzo cracker or ½ cup breadcrumbs
  • ¼ cup nutritional yeast
  • 1 clove garlic peeled
  • cup olive oil

Instructions

  • Cut the zucchini into sticks (fry shapes), about 3 inches long and ½ inch thick.
  • Preheat oven to 425 degrees F. Line a baking sheet with aluminum foil. Place wire baking sheets on top and spray with non stick cooking spray.
  • Combine milk, ¼ tsp salt, and ¼ tsp pepper in shallow bowl.
  • In a food processor, chop walnuts and matzo (if using) until small pieces. Add remaining salt and pepper, nutritional yeast, and breadcrumbs (if using). Process until all is the consistency of breadcrumbs.
  • Heat olive oil in a small fry pan over medium-low heat. When warm, add whole clove of garlic. Cook until fragrant. Remove garlic from oil.
  • Add breadcrumb/nut mixture to oil. Toast until golden brown. Remove from heat, and place in a shallow dish.
  • Dip zucchini fries in milk, then in breadcrumb mixture. Press gently to ensure crumbs stick. Place carefully on prepared wire rack, ensuring fries do not touch.
  • Bake at 425 for 20-30 minutes, until crumbs are crispy and golden brown.

Notes

To cook in the air fryer:  Preheat air fryer to 400.  Spray lightly with cooking spray, fry for 5 minutes.  Remove basket, shake fries, spray again with cooking spray, and cook for 5 more minutes, or until desired level of crispness.
See the post for recommendations for LID friendly milk and breadcrumbs.

Nutrition

Calories: 387kcal | Carbohydrates: 9g | Protein: 7g | Fat: 38g | Saturated Fat: 4g | Polyunsaturated Fat: 16g | Monounsaturated Fat: 16g | Sodium: 361mg | Potassium: 447mg | Fiber: 4g | Sugar: 3g | Vitamin A: 203IU | Vitamin C: 18mg | Calcium: 103mg | Iron: 2mg

Let me know how you enjoy your crispy vegan zucchini fries!

Whether it is the holidays or everyday, these dairy free mashed potatoes hit the spot.  So creamy and full of flavor, you would never guess they are dairy free and vegan!  They are also low iodine diet friendly.

Some links on this site are affiliate links, meaning I may receive a commission at no cost to you if you click on them. As an Amazon Associate, I earn from qualifying purchases.

What You’ll Need

To make these potatoes, you’ll need:

  • Potatoes
  • Bay leaf
  • Garlic
  • Vegan margarine or extra virgin olive oil
  • Salt (non iodized)
  • Black pepper

How to Make

Mashed potatoes are not the most complicated dish, but can be a little tricky.  Here are few tips:

  • Wash the potatoes well, before and after peeling.  You don’t want dirt in your food.
  • Start the potatoes in cold water.  This ensures they cook evenly.
  • Put flavor in the water.  Potatoes can absorb flavor from the cooking water.  We add garlic and bay leaf in this recipe.  You could cook in broth as well.
  • Don’t overcook the potatoes.  You want them tender enough to mash, but if you overcook them, they will get too starchy and gluey.
  • Drain the cooked potatoes well.  Then return to the hot pot to let excess water evaporate before adding other ingredients.
  • Season the potatoes well. Potatoes themselves are very bland. Taste test to see if you need to up your salt and pepper.
  • I find these are much creamier if you use an electric mixer to “mash” or whip them. You can use a potato masher as well, but it may take longer to get to a really creamy texture if that is what you are after.

Mashed Potato Variations

Depending on what you want to use the potatoes for, you could easily switch up the seasonings.  

  • You could substitute coconut milk for half of the vegan margarine or oil, but it will add it’s distinctive flavor. Avoid almond or oat milk. They turn the texture gluey.
  • You can reserve some of the starchy cooking water for blending.
  • You could add a cheese replacement, like nutritional yeast, for a more savory flavor.
  • The garlic infused oil variation listed in the recipe is my favorite.  It adds a great burst of flavor but is not overpowering.
  • You could make the mashed potatoes in the Instant Pot.  Same ingredients.  Cook on high pressure for 8 minutes, release the pressure manually, drain, and then mash.  

FAQ

What is the best kind of potato to use for mashed potatoes?

The short answer is whatever potato(es) you prefer.

Potatoes are generally categorized as “starchy”, “waxy”, or “all-purpose”. Starchy potatoes tend to be better for mashing.  These include russet, white, and yellow potatoes.

Red, purple, and fingerling potatoes are more waxy.  While you can still make mashed potatoes with them, it will more likely be chunky and less smooth and creamy.

Bon Appetit recommends you use half of each kind, starchy and waxy.  

If following the low iodine diet, I recommend using russet potatoes, as they are the easiest to peel.  Potato flesh is fine on the low iodine diet but not the peels. Read more about the low iodine diet here.

Should I cook the potatoes in broth or water?

Either.  Broth will add more flavor to the potatoes.  It just depends on how you will be serving the potatoes and how strong a flavor you want them to have.

I used water in this recipe flavored with garlic cloves and bay leaf.  Broth is difficult for the low iodine diet unless using homemade (which is a chore), so I steered clear.

What is vegan margarine and is it low iodine?

Vegan margarine is margarine that contains no animal products. While all margarines are spreads made from vegetable oils, many still contain milk as whey added to them.

Some vegan margarine is low iodine. It depends on the salt added. Earth Balance has vegan margarines that do no use sea salt. According to an email from Conagra (the manufacturer) from 2018 posted on LID Life, they do not use iodized salt.

If this is concerning for you, olive oil is a safe, low iodine choice as well.

Earth Balance Non-GMO Vegan Soy Free Buttery Spread

Tips for Storage and Reheating

The good news is that since these potatoes don’t have butter, they won’t get hard in the fridge.  

Cool cooked potatoes uncovered, then cover once cooled.  They will keep in the fridge for 2-3 days.  Reheat in the microwave, or bake, covered at 350 for 20-30 minutes.

Let me know how you enjoy these creamy dairy free mashed potatoes!

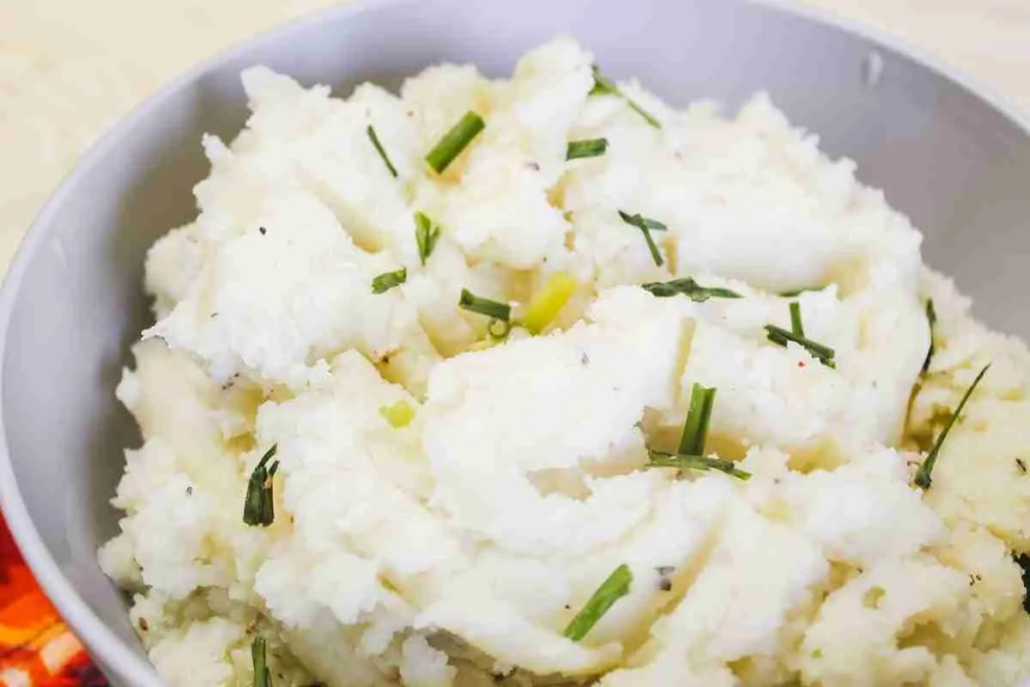
Mashed Potatoes with chives in a gray bowl with a fork on top of a harvest napkin
Print Recipe
No ratings yet

Creamy Dairy Free Mashed Potatoes

Delicious, smooth mashed potatoes packed with flavor without any dairy.
Prep Time10 minutes
Cook Time30 minutes
Total Time40 minutes
Course: Side Dish
Cuisine: American
Keyword: dairy free, garlic, vegan, vegetarian
Servings: 10
Calories: 210kcal

Equipment

  • electric mixer

Ingredients

  • 5 lbs potatoes peeled and chopped
  • 2 cloves garlic peeled
  • 1 bay leaf
  • ¼ cup vegan margarine or extra virgin olive oil
  • 1 tsp salt non-iodized
  • ½ tsp ground black pepper
  • 2 cloves garlic minced, optional

Instructions

  • Place potatoes, garlic, and bay leaf in large pot. Cover with cold water.
  • Place pot over medium-high heat. Bring to a boil. Reduce heat, keeping at low boil. Boil for 20-25 minutes, until potatoes are very tender.
  • Optional step if using olive oil and optional garlic: While potatoes are cooking, heat oil and garlic in a small skillet over medium low heat. Cook until garlic just begins to be fragrant and lightly brown. Remove from heat.
  • When potatoes are tender, drain and remove bay leaf. Return to warm pot and let sit for 1-2 minutes for extra water to evaporate.
  • Add margarine (or olive oil), salt, and pepper. Mash (or whip) with electric mixer to desired smoothness. Add more margarine, salt, or pepper as desired for taste.

Notes

I recommend Earth Balance Soy Free Vegetable Buttery Spread.  According to LIDLife Community site, Conagra Foods (who manufactures Earth Balance) does not use iodized salt without specifying on the label (email communication from 2018).  If you feel uncomfortable with that, use olive oil.  The spread is more neutral in flavor.  You can taste the olive oil a bit more, but it isn’t off putting.   
The optional warmed olive oil with the garlic adds a great garlicky punch to the potatoes.  If serving plain, I highly recommend it.  If eating with gravy or serving to a larger crowd, I might skip it.  

Nutrition

Serving: 0.5cup | Calories: 210kcal | Carbohydrates: 40g | Protein: 5g | Fat: 4g | Saturated Fat: 1g | Polyunsaturated Fat: 1g | Monounsaturated Fat: 1g | Trans Fat: 1g | Sodium: 283mg | Potassium: 963mg | Fiber: 5g | Sugar: 2g | Vitamin A: 221IU | Vitamin C: 45mg | Calcium: 30mg | Iron: 2mg

Vegan zucchini muffins are a delicious, healthy snack or breakfast. These muffins are moist while still being low in fat. If you have extra zucchini from your garden or the farmer’s market to use up, these muffins are a crowd pleaser with lots of variations to suit your tastes. Vegan substitutions also make these low iodine if you are following the low iodine diet.

Some links on this site are affiliate links, meaning I may receive a commission at no cost to you if you click on them. As an Amazon Associate, I earn from qualifying purchases.

What You’ll Need

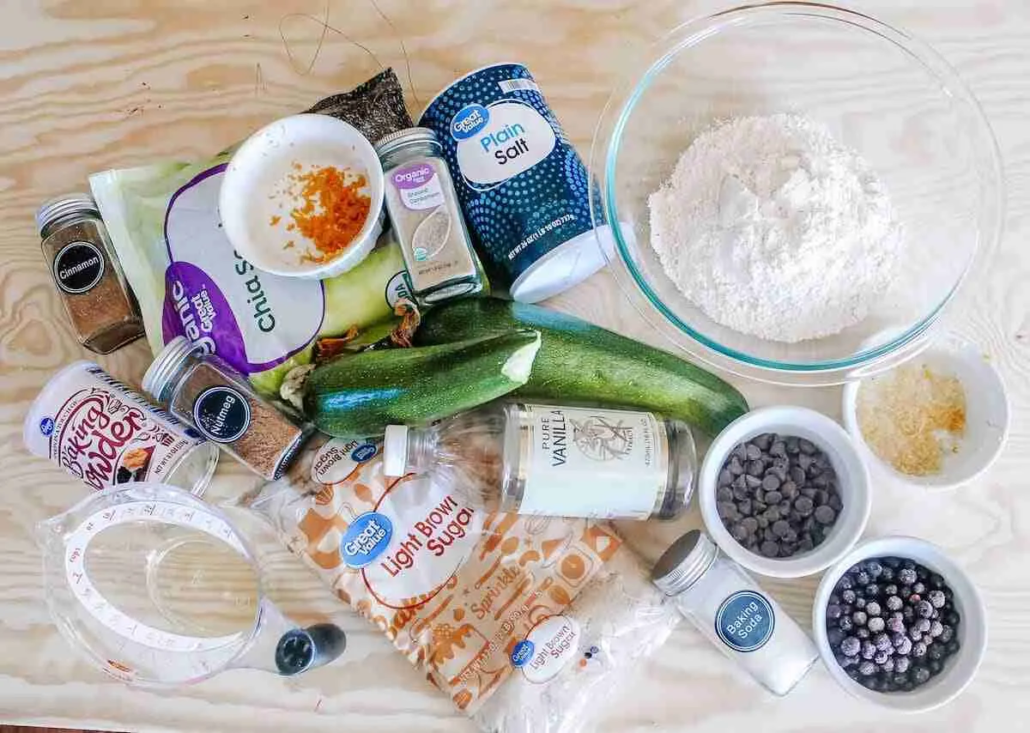
For these vegan zucchini muffins, you will need shredded zucchini, brown sugar, vegetable oil, chia seeds, vanilla, all-purpose and white whole wheat flour, iodine free salt, baking powder and soda, nutmeg, cardamom, and cinnamon. You’ll also need any mix-ins you want to add (see below).

Where do I find that?

  • Chia seeds: I have been able to find chia sees at my regular grocery stores and Wal-Mart. It can often be in the gluten free or specialty baking area. A health food store would also be a good place to look.
  • White whole wheat flour: I have found this a little bit harder to find since COVID-19 and the resulting food shortages. I like buying it from King Arthur online or have found generic brand at my local Kroger store.
  • Ground cardamom: Ground cardamom should be with all the other spices at your local grocery store. If you don’t want to buy it, you could substitute ground allspice or ground cloves.
  • HOW MUCH ZUCCHINI? This recipe calls for 1 ½ pounds of shredded zucchini. If you do not own a kitchen scale, this would be 3 small zucchini, 2 medium zucchini. The zucchini I have pictured were from my garden and more on the medium size.
 How to Make
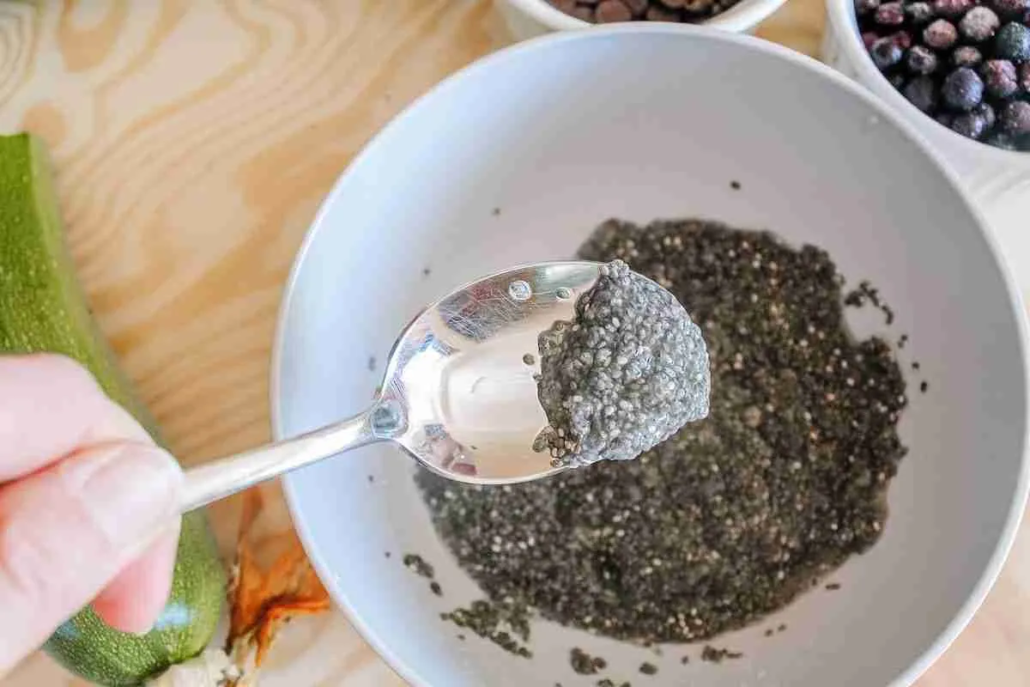
  • Make chia “eggs” by mixing chia seeds with water and letting gel.
  • Shred zucchini and squeeze out excess water.
  • Mix sugar, chia eggs, and wet ingredients.
  • Fold in zucchini and dry ingredients. Mix until half combined.
  • Add in mix-ins if using. Mix until just combined.
  • Bake until a toothpick comes out clean. Cool in pan for 10 minutes, then remove from pan to cool completely.

Tips for Success

  • Start your chia eggs first. The chia and water need to “gel” for 5-30 minutes before using them. This picture shows what they should look like.
  • Use a machine to help you shred the zucchini. The shredding blade on a food processor is much faster than using a box grater. You could also use your spiralizer if you have one and then chop up the spirals.
  • Really squeeze out the water from the zucchini. Zucchini helps make our muffins moist, but we don’t want them soggy. We put a lot of zucchini in these muffins, so we want to make sure we do a good job squeezing out the excess water. Wrap your shreds in a clean, fluff free kitchen towel. Squeeze over the sink.
  • Don’t overmix! To keep your muffins light and fluffy, mix until just combined. There should not be any dry streaks of flour in the batter, but it may still be lumpy. Do not beat or whisk it smooth.

Variations

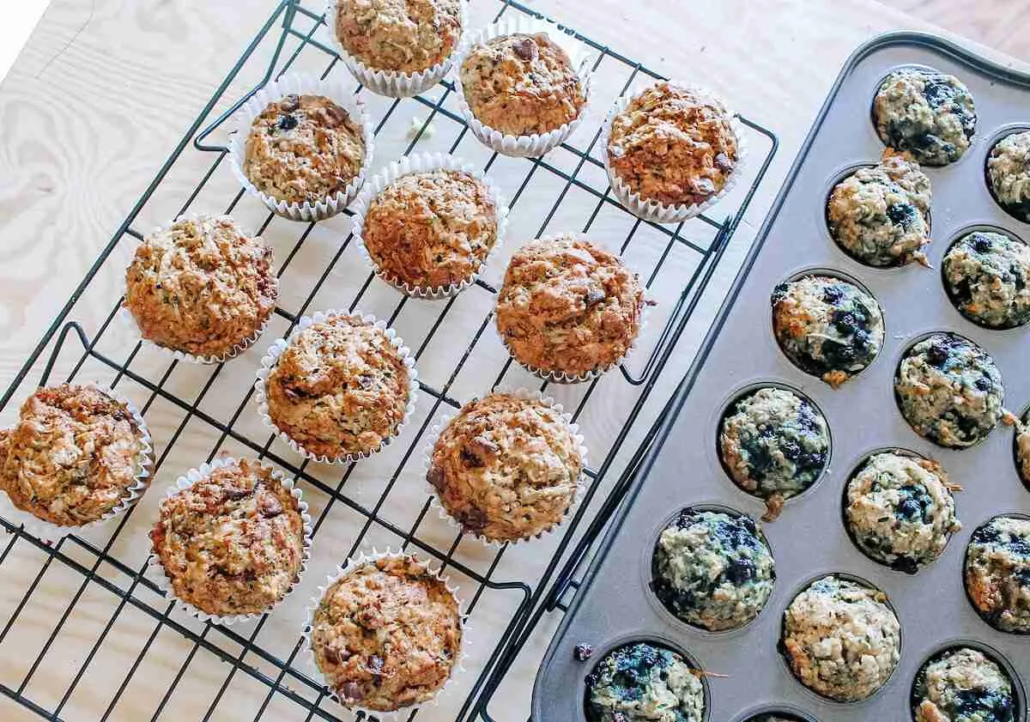
There are so many ways you can make these zucchini muffins your own. In general, I would recommend ¾ cup to 1 cup total of mix-ins. I have pictured here regular sized muffins with chocolate chips and mini lemon zucchini muffins with blueberries.

Citrus zest can add great flavor as well. I use the zest from a whole lemon or whole orange if I am using it.

Ideas for mix-ins:

  • Orange zest and chopped pistachios
  • chopped walnuts and chocolate chips
  • lemon zest and blueberries
  • pumpkin seeds
  • raisins
  • coconut flakes

You can also make this recipe as one large loaf of zucchini bread or into twice as many mini muffins. Adjustments for baking times are in the recipe below.

FAQ

Why bake with zucchini?

Zucchini is great for lowering the fat in baked goods while adding moisture and fiber. It also is very mild so it generally does not add any flavor.

What makes these “healthy”?

These muffins are low in fat, thanks to the added zucchini. They are packed with vegetables, thanks to 1 ½ pounds of zucchini – which provides vitamins, antioxidants, and fiber. They also have whole grain flour.

Are there other egg substitutes I could use?

For a low iodine diet, you could substitute 4 egg whites for the chia “eggs” in this recipe. It would no longer be vegan.

Ground flax seeds could be substituted for the chia seeds – same amount of ground flax to water as chia seeds to water.

For more on vegan egg substitutes, check out The Kitchn or Minimalist Baker.

What is white whole wheat flour?

This is whole wheat flour made from soft white wheat, rather than hard red wheat. The traditional whole wheat flour you are used to that is very brown is from hard red wheat.

White whole wheat flour is still a whole grain and full of fiber and nutrients. It just comes from a different type of wheat plant.

Why vegan recipes for low iodine diet?

A low iodine diet is not necessarily a vegan diet. But vegan recipes can be a good place to look for low iodine recipes since they will not contain dairy or egg yolk.

However, not all vegan recipes will be low iodine friendly. They may contain soy products, sea salt, and milk alternatives that do not work.

Can I make these gluten free?

These could easily be made gluten free by subbing a gluten free all-purpose flour mix that has gums in it.

Could I use other flours?

If you can not find the white whole wheat flour, you could use regular whole wheat flour or only all-purpose flour. I have not experimented with oat or spelt flours.

Storage and Reheating

These muffins can be stored at room temperature for about 5 days.

I like to freeze muffins to last longer. They generally last about 3 months. I either let the muffins thaw at room temperature or microwave them for 20-30 seconds, wrapped in a paper towel or napkin.

Serving Suggestions

These vegan zucchini muffins make a great breakfast, snack, or add them to lunch or dinner as a side to soup or salad.


Like these vegan zucchini muffins? You might also like these:

Eggless Chocolate Pudding

Gingerbread Banana Bread from LID Life

Regular and mini zucchini muffins on a wooden table with a zucchini behind them
Print Recipe
5 from 2 votes

Vegan Zucchini Muffins

Easy, moist, and delicious muffins perfect for end of summer when zucchini is plentiful. Easy to change the mix-ins or switch to a loaf or mini muffins.
Prep Time15 minutes
Cook Time25 minutes
Total Time40 minutes
Course: Bread
Cuisine: American
Keyword: quick, summer
Servings: 24 muffins
Calories: 101kcal
Author: Kimberly Marsh, MS, RD

Ingredients

Muffins

  • 2 tbsp chia seeds
  • 5 tbsp water
  • 1 ½ lbs zucchini shredded
  • 1 cup brown sugar packed
  • ¼ cup vegetable oil
  • 1 tsp vanilla
  • 1 cup all-purpose flour
  • 1 cup white whole wheat flour
  • 1 ½ tsp no iodine salt
  • 1 tsp baking powder
  • 1 tsp baking soda
  • ½ tsp ground nutmeg
  • ½ tsp ground cardamom
  • ½ tsp ground cinnamon

Optional Mix-Ins (choose up to 1 zest and 1 cup of mix-ins)

  • 1 lemon zested
  • 1 orange zested
  • chocolate chips
  • chopped nuts almonds, walnut, or pistachios
  • wild blueberries
  • coconut flakes or shredded coconut
  • raisins

Instructions

  • Preheat oven to 350°F. Line muffin pan with paper liners or spray with cooking spray.
  • Combine chia seeds and water in a small bowl. Let sit for at least 5 minutes, up to 30 minutes. The chia "eggs" are ready to use when the water has been absorbed, and it has formed a gloopy gel.
  • Shred zucchini on a box grater, using a food processor grater attachment, or a spiralizer.
  • Wrap shredded zucchini in a clean, fluff free kitchen towel. Over sink or extra bowl, wring out excess water from zucchini.
  • Whisk together brown sugar, oil, chia eggs, vanilla, and zest (if using) in a medium bowl. Stir in shredded zucchini.
  • Add remaining ingredients except mix-ins. Fold into zucchini mixture until about half mixed. Add in mix-ins (if using). Mix until just combined - no streaks of flour but will still be lumpy.
  • Pour into prepared muffin pan, filling each cup ¾ full. Bake for 25-30 minutes, until a toothpick inserted into the center comes out clean. Cool in pan for 10 minutes, then remove muffins to wire rack to cool completely.

Notes

If making a lemon blueberry muffin, I would omit nutmeg, cardamom, and cinnamon.  
Nutrition facts do not include any mix-ins.
To make a 9x5 in loaf, bake at 325 for 60-75 minutes, until a toothpick inserted in the center comes out clean.  Let cool in pan for 20-30 minutes, then remove loaf to wire rack to cool.
To make 48 mini muffins, bake at 350 for 15-17 minutes, until a toothpick inserted in the center comes out clean.  Let cool in pan for 10 minutes, then remove muffins to a wire rack to cool.
Recipe adapted from America's Test Kitchen

Nutrition

Serving: 1muffin | Calories: 101kcal | Carbohydrates: 18g | Protein: 2g | Fat: 3g | Saturated Fat: 2g | Polyunsaturated Fat: 1g | Monounsaturated Fat: 1g | Trans Fat: 1g | Sodium: 214mg | Potassium: 102mg | Fiber: 1g | Sugar: 10g | Vitamin A: 57IU | Vitamin C: 5mg | Calcium: 33mg | Iron: 1mg

Tahini toast with apples and honey is a great breakfast for a low iodine or dairy free diet. The combination of sweet and savory is delicious while the protein from tahini and fiber from the whole grain bread and apples will keep you full for hours.

Importance of Breakfast

We have all heard the saying, “Breakfast is the most important meal of the day.” Is that true?

The word breakfast comes from “breaking the fast”. No matter when you first eat for the day, you are breaking your overnight fast. That could be when you first wake up or at 2 pm. We just traditionally think of eating breakfast in the morning.

There are some benefits of eating a morning meal. Most of these have been seen through observational studies, so are not proof, but do suggest the following.

  • More alertness. Our brain needs energy to function. Eating can help wake up our brain and help us feel more alert and happy. However, overeating can lead to grogginess and mental fog. With a full tank, you can also focus on your work rather than your growling stomach.
  • Improved insulin sensitivity. Our bodies are more insulin sensitive in the morning, meaning it can digest the carbohydrates you consume better. Also, people who eat breakfast seem to have a lower incidence of diabetes.
  • More energy. Just like your brain, your body needs energy. Fueling your body with healthy breakfast can help you get moving.

I am not saying that everyone has to eat breakfast. But I would encourage you to consider why you do not eat breakfast. Is it due to time? Do you not like traditional breakfast foods? Do you feel sick when you do? Looking at the reason may determine if there are ways you could add a healthy breakfast to your diet.

Components of a Healthy Breakfast

Any old breakfast, however, will not necessarily give you all of these benefits. You want to have a balanced meal, with good lean protein and a good source of fiber.

Why protein? Protein is essential for building and maintaining muscle. Breakfast tends to be a low protein meal for most Americans. However, if we increase our protein at breakfast and therefore distribute our intake more evenly throughout the day, we seem to retain muscle better as we age.

Another benefit of protein is it helps us feel full longer. Protein naturally takes longer for our body to digest, meaning it stays in our digestive system longer and giving us the feeling of being full.

What are good sources of protein for breakfast? Eggs, egg whites, milk, yogurt, cheese, and nut butters are common sources of breakfast protein. But you can be creative, adding beans, chicken breast, or lean beef or pork. Just avoid high sodium traditional breakfast meats too regularly, such as bacon or sausage.

Why fiber? Fiber is important for digestive and heart health. Our body cannot actually digest fiber plus fiber absorbs water and expands in our stomachs. These two combined help us feel full longer when eating high fiber foods.

Good spruces of fiber at breakfast are fruits, vegetables, and whole grains. Fruit juices are not good sources of fiber, so I would suggest whole fruit over juice.

Low Iodine Breakfast

Getting protein on a low iodine diet at breakfast can be tricky. Most of the traditional breakfast protein foods are eliminated. Egg whites and nut butters are good choices still. You could also add lean meat, just being cautious to stay within the recommended 6 ounces per day.

Fiber is easy on the low iodine diet. However, oatmeal can get monotonous quickly. You can mix up the fruits you mix in, but it will still get repetitive.

Different toast combinations are a great way to add variety as well as fruits and vegetables to your morning routine anytime, but especially on the low iodine diet. Avocado toast is particularly famous in recent years. But there are plenty of options beyond avocado.

Tahini Toast

In today’s recipe, I suggest using tahini as a spread. Not only because the taste is great, but for some variety as nut butters are consumed frequently on the low iodine diet.

Tahini is a paste made from sesame seeds, similar to peanut butter coming from peanuts. It is frequently used in Mediterranean cooking, such as recipes for hummus. It is the consistency of creamy peanut butter, but does have the oil separation seen in natural nut and seed butters. Another great plus of tahini is most brands I have ever found are unsalted, so safe for the low iodine diet.

You could switch around the toppings on your tahini toast as you prefer. Bananas and pears come to mind as good fruit substitutes. You could continue a more Mediterranean theme with tomatoes, cucumbers, and unsalted garbanzo beans.

Allergen warning: While people with peanut allergies are often also allergic to sesame seeds, tahini and other sesame seed products are usually safe for those with tree nut allergies. Please proceed with caution and discuss it with your physician/allergist.

tahini toast with apples and honey
Print Recipe
No ratings yet

Tahini Toast with Apples and Honey

Tahini toast with apples and honey is a great blend of sweet and savory that will keep you full and energized all morning long.
Prep Time5 minutes
Cook Time2 minutes
Course: Breakfast
Cuisine: Mediterranean
Servings: 1 serving
Calories: 271kcal

Ingredients

  • 1 slice whole grain bread homemade
  • 1 1/2 tbsp tahini
  • 1/2 apple, sliced
  • 1 tsp honey

Instructions

  • Toast bread to desired doneness.
  • Spread tahini in even layer over all of bread. Lay sliced apples over the top.
  • Drizzle with honey. Enjoy!

Nutrition

Calories: 271kcal | Carbohydrates: 35g | Protein: 8g | Fat: 13g | Saturated Fat: 2g | Sodium: 121mg | Potassium: 274mg | Fiber: 5g | Sugar: 17g | Vitamin A: 65IU | Vitamin C: 5mg | Calcium: 68mg | Iron: 2mg
Eggless chocolate pudding is thick, creamy, and delicious. Also dairy and gluten free, this is a great treat for those with food allergies as well as on the low iodine diet.

I will admit that I am a chocolate lover. One of the hardest parts of the low iodine diet was many of my normal chocolate treats were not allowed. Cocoa powder is ok on the low iodine diet, but most forms of “solid” chocolate have dairy products added.

Some links on this site are affiliate links, meaning I may receive a commission at no cost to you if you click on them. As an Amazon Associate, I earn from qualifying purchases.

Types of Chocolate

There are dairy free chocolate chips if you look. Here are a few brands available online. Please note buying online often means buying in bulk. Check your local grocery or health food stores for individual packages. *This post contains affiliate links. As an Amazon Associate I earn from qualifying purchases.


This eggless chocolate pudding has cocoa powder and melted chocolate chips, giving it a double chocolate punch. If you are following the low iodine diet, be sure to use dairy free chocolate chips. If not, use whatever chips you like.

Eggs and Nutrition

Egg yolks thicken traditional puddings. Since egg yolks are high in iodine, this recipe substitutes avocados. They provide a rich creamy texture without the iodine. And the mild taste of avocado is hidden behind the two forms of chocolate.

Previously, I mentioned pudding as a great option to eat after thyroid surgery. It’s soft, creamy texture and chilled state make it a soothing food. Most puddings are generally a good source of protein due to the eggs and milk in them. This pudding is free of both, but it is a good source of calories and monounsaturated fats. So even though you don’t have to follow the low iodine diet immediately after surgery, this eggless chocolate pudding is a great snack to try no matter your dietary restrictions.

Print Recipe
No ratings yet

Eggless Chocolate Pudding

Creamy, delicious pudding with two forms of chocolate and thickened by avocados.
Prep Time10 minutes
Chill Time2 hours
Course: Dessert
Servings: 4
Calories: 365kcal

Ingredients

  • 1 cup water
  • 1/4 cup granulated sugar
  • 1/4 cup cocoa powder
  • 1 tbsp vanilla
  • 1/4 tsp peppermint extract optional
  • 1/4 tsp salt
  • 2 avocados large
  • 3 1/2 ounces dark chocolate chips

Instructions

  • Combine water, sugar, cocoa, vanilla, peppermint (if using), and salt in a small pan. Cook over medium heat until it simmers and sugar and cocoa dissolve. Cook for 2 minutes after it begins to simmer. Remove from heat and cover pan.
  • Put flesh of avocado into a food processor. Process for 2 minutes, until it is very smooth. With processor running, slowly add chocolate water mixture. Process until smooth and completely incorporated, about 2 minutes more.
  • Microwave dark chocolate chips until melted, stirring at 30 second intervals. Add to avocado mixture and process until smooth.
  • Transfer pudding to 4 serving cups, cover, and refrigerate at least 2 hours before serving.

Notes

If low iodine, use iodine free salt and dairy free chocolate chips.
Adapted slightly from America's Test Kitchen

Nutrition

Calories: 365kcal | Carbohydrates: 39g | Protein: 5g | Fat: 23g | Saturated Fat: 10g | Cholesterol: 1mg | Sodium: 183mg | Potassium: 732mg | Fiber: 9g | Sugar: 22g | Vitamin A: 149IU | Vitamin C: 10mg | Calcium: 96mg | Iron: 2mg
The key to following the low iodine diet for me was having a great bread recipe. If I had delicious homemade bread available, I could always find something to eat as a meal or snack. This whole wheat honey oat bread is delicious and healthy, a great combination.

Iodine in bread?

Bread and other bakery foods that you buy from the store contain iodine in a few forms.

  • Baked goods almost always contain salt. Without it, bread would be extremely bland – just flour, yeast, water, and a little sugar. In sweet foods, the salt cuts the sweetness. You don’t want salt to be eliminated. But determining the kind of salt used is difficult. The only salt that is often specified on labels is sea salt, which you definitely want to avoid on the low iodine diet.
  • Store bought bread and rolls often contain “dough conditioners”, ingredients added to improve the texture or flavor of the bread. Only some dough conditioners contain iodine. But ingredient labels generally show a long list of conditioners and say “includes one or more of the following”.
  • Many breads and baked goods contain milk, nonfat dry milk, or eggs. The low iodine diet restricts these ingredients.

I did a quick scan of 4 bread products I had in my house – two different kinds of sandwich bread, hot dog buns, and Hawaiian rolls. All 4 contained at least 1 of these ingredients.

Opt for Homemade

Homemade bread can seem really overwhelming to people. Many people opt for bread machines – I did the first two times I followed the low iodine diet. Bread machines simplify the steps of making homemade bread. But I had fairly mixed results on quality of my bread. I also could only make one loaf at a time. The large square loaves made awkward sized slices for making into sandwiches – with it being so large, it was hard to slice thinly.

Tips for Homemade Bread Success

With a bit of practice and a few tricks, homemade bread isn’t really that complicated. Here a few tricks to improve your loaves:

  1. Use good yeast. I buy yeast in bulk and store it in the freezer. Then I have a small container I keep in the fridge for using regularly. Unopened packages of yeast can be stored in the freezer for up to 2 years, according to Red Star Yeast. Once opened, use within 4 or 6 months if stored in the refrigerator or freezer, respectively. I will admit that I have yeast much older than 2 years in my deep freezer. It still works just fine for me.
  2. If you are concerned about your yeast, you can test the freshness using warm water and sugar. Details can be found on Red Star Yeast.
  3. This whole wheat honey oat bread recipe calls for instant yeast. Instant yeast is often labeled “bread machine yeast”. I prefer this because you can just mix it into your liquid then start adding the flour and mixing the bread. You can use active dry yeast. However, you would want to “proof” it in warm water with a little sugar for 10-15 minutes first.
  4. Use a thermometer. You will kill the yeast if you use water that is too hot. However, I find that most people are so worried about the water being too hot that they don’t make it warm enough. I ALWAYS take the temperature of my liquid before adding the yeast. I aim for 115-120 degrees. It will work if the water is cooler, it will likely just take longer to rise.
  5. Don’t over-flour the dough. While you want a strong dough for a bread loaf, you don’t want it stodgy. Too much flour makes for a dense loaf.
  6. If using whole wheat flour (regular or white), add some extra kneading time. Just 2-3 minutes.
  7. Practice, practice, practice. As you make bread more often, you will get better at it.

Toast with some nut butter or jam is a quick, easy snack. By using whole wheat honey oat bread, you will get more fiber, which is helpful on a low iodine diet. Nut butter and jelly sandwiches were a go-to food for me when I followed the low iodine diet. I also liked to take a slice or two of bread with me if I went out to eat. Then I could order a salad with no dressing or cheese and supplement with the bread for a more filling meal.

Enjoy!

Print Recipe
5 from 1 vote

Whole Wheat Honey Oat Bread

Delicious loaf of whole grain bread the whole family will love. Perfect for sandwiches or just a slice of toast.
Prep Time2 hours 30 minutes
Cook Time40 minutes
Course: Bread
Servings: 32 slices
Calories: 109kcal
Author: Kimberly Marsh, MS, RD

Ingredients

  • 2 1/2 cups boiling water
  • 1 cup rolled oats
  • 1/2 cup brown sugar
  • 1 tbsp honey
  • 4 tbsp canola oil
  • 1 tbsp salt iodine free
  • 1 tsp ground cinnamon optional
  • 1 tbsp instant yeast
  • 5 1/2 cups white whole wheat flour

Instructions

  • Combine water through cinnamon in large mixing bowl. Cool to lukewarm (no more than 120 degrees F).
  • Add the yeast and flour, stirring to form a rough dough. Knead with a dough hook for 7 minutes or by hand for 10 minutes; knead until dough is smooth an satiny.
  • Remove dough ball to counter. Lightly grease bowl. Place dough in bowl. Cover with a light towel or lightly greased plastic wrap. Let rise for about 1 hour, until double in bulk.
  • Divide dough in half and shape into a loaf. Place in lightly greased 9×5 inch loaf pans. Cover pans with towel or plastic wrap as above. Allow loaves to rise until they crown 1 inch over the rim of the pan, about 1 hour.
  • Preheat oven to 350. Bake for 35-40 minutes, or until golden brown. Immediately remove loaves to wire rack to completely cool.

Notes

The cinnamon flavor isn’t overpowering, but is noticeable.  For toast, that flavor is wonderful.  For savory sandwiches, that can be less desirable.  Use according to your intended use for the bread.  If you can’t find white whole wheat flour, you could do half whole wheat flour and half all-purpose or bread flour.  The bread would not then be “whole grain”, but still yummy.
Slightly adapted from King Arthur Flour

Nutrition

Calories: 109kcal | Carbohydrates: 20g | Protein: 3g | Fat: 2g | Saturated Fat: 1g | Trans Fat: 1g | Sodium: 219mg | Potassium: 38mg | Fiber: 2g | Sugar: 4g | Vitamin A: 1IU | Vitamin C: 1mg | Calcium: 19mg | Iron: 1mg